How to Start a Blog: Step By Step, With Images-The Blogger Course(Week 1)

Having a blog is a great thing because you can share anything you want (…and if have a business mindset you can also earn a decent passive income from your blog.
As a web desinger, I normally create Blogs & Websites,and usually suggest creating a blog using your own domain and hosting, and creating your blog via WordPress(.org).There is no doubt that they presents better blogging platform when compared to free blogging platforms like BlogSpot.com and WordPress.com.
However, many newbies who want to start blogging don’t want to make an initial investment of funds to create a blog. This is completely reasonable,and I've also developed a tecnique on how to blog and earn on Blogspot.com platform.
There are many blogging platforms which offer users the ability to create free blogs. If you are looking for a simple free blog, my suggestion would be to start blogging with BlogSpot.com,because that's what The Blogger Course is all about.
Once you have some blogging experience, you can advance and become more professional by purchasing a custom domain or with a self-hosted WordPress blog.
There are 7day in the first week so i'll suggest you take this proccess gradually.
Step 1

To create your free BlogSpot blog site, head over to Blogger.com and login using your Google account. If you don’t have a Google (gmail) account, you can create one for free.
For a first time user, you will see an option to use the identity from your Google Plus profile, or you can use your limited BlogSpot profile. I recommend using your Google Plus profile,Once you are logged in, click on “new blog”.
Step 2
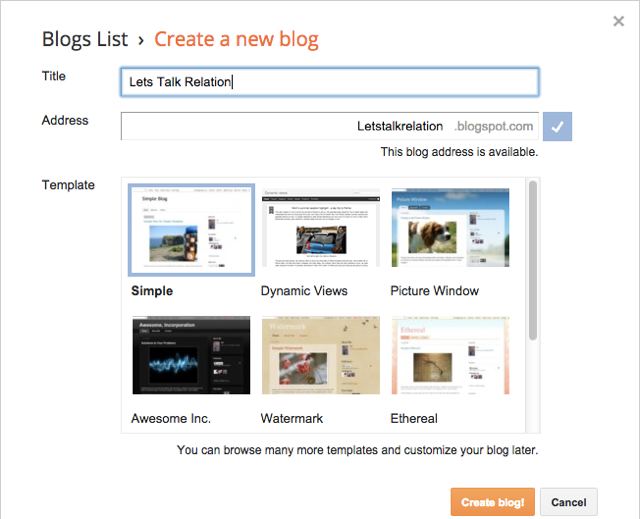
The first thing you need to do is add a name and select your domain. I suggest you read “How To Select a Domain Name” for additional information.
Avoid using your personal name as the domain name, and instead use some generic domain name that you can brand later with a custom domain.
You can then select a blog template (you can change it anytime), and click on “Create Blog”.
Now your blog is created, but you are not done yet!
There are a few settings that you need to set on your newly created BlogSpot blog to make it easy to use.
You are now on the BlogSpot dashboard where you will see your blog’s backend. From here you can go to “Settings” and make changes to improve your blog’s visibility.
Here is a screenshot of what you should be seeing:
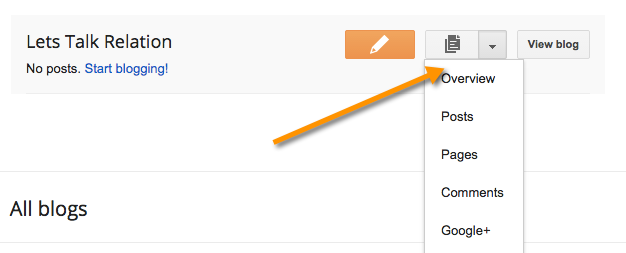
From here you can click on “Posts” > “New post” and start writing your very first blog post!
But before you write your first post, I would recommend that you go to “Pages” and create at least one “About” page describing who you are and what your blog is about.
Most importantly, you should change your blog’s template as the default one is generic and boring (in my opinion,but i'll elaborate in week 3 ).
Step 3

Once you have a few blog posts up and running, you can go to “Settings” > “Earnings” and enable AdSense for your blog. This will allow you to earn money from your free BlogSpot blog.
Note:please do this only when you have at least 5 posts and 100 daily views
comment to share your thoughts.


Thank you 😊 so much
ReplyDeleteThank you but to be honest I do still understand
ReplyDeleteI mean I do not get
ReplyDelete